The Points of Interest (POI)
The POI module allows you to manage declared POIs, their types, and vehicles assigned to given depots.
1. POI types
Each customer can define their own list of POI types.
The POI type consists of:
- names - any POI type name declared by the user
- is_depot flags - indicates whether the type (and all associated POIs) constitute a fleet depot/base.
1.1. List of POI types
To go to the list of declared POI types, edit it or create a new one press the icon below in the POI list. 
How to go to the list of POI types? 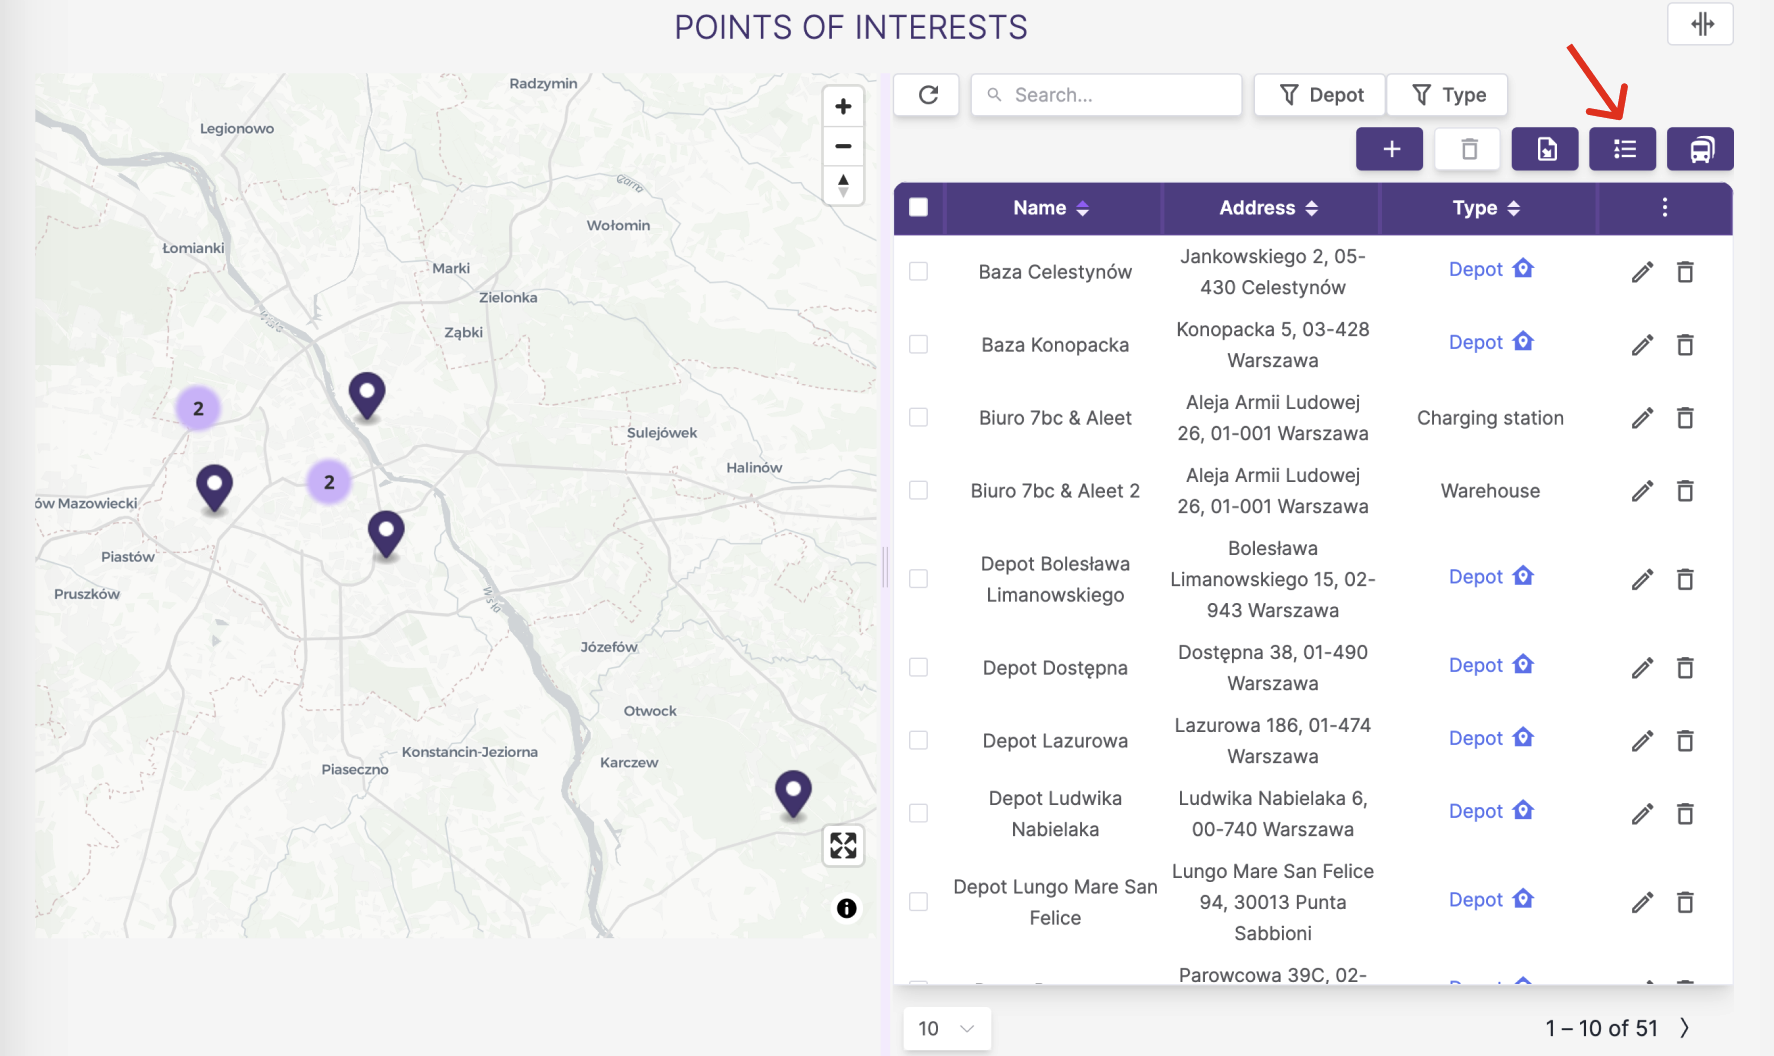
POI type lists_ 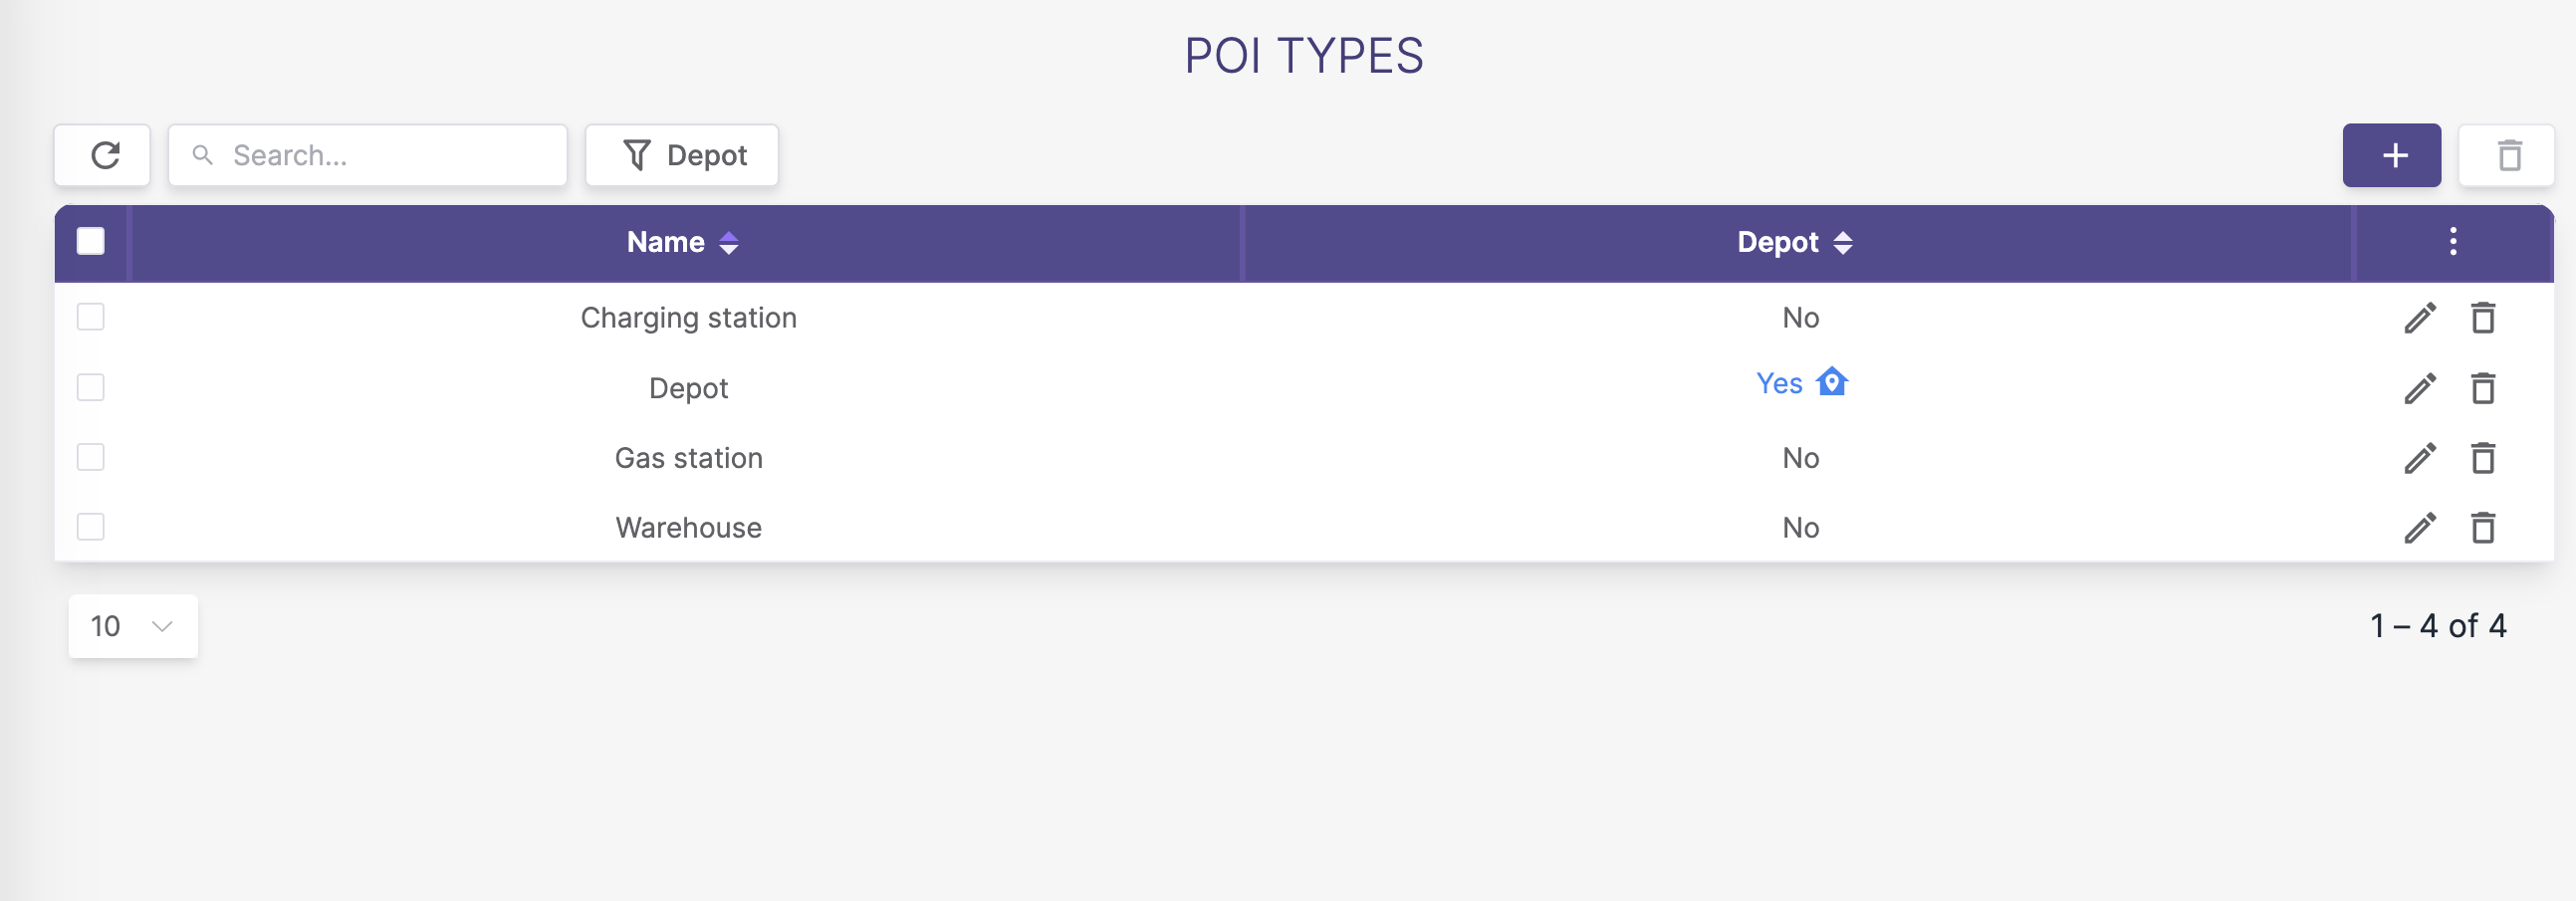
1.2. Adding POI types
POI type creation form: 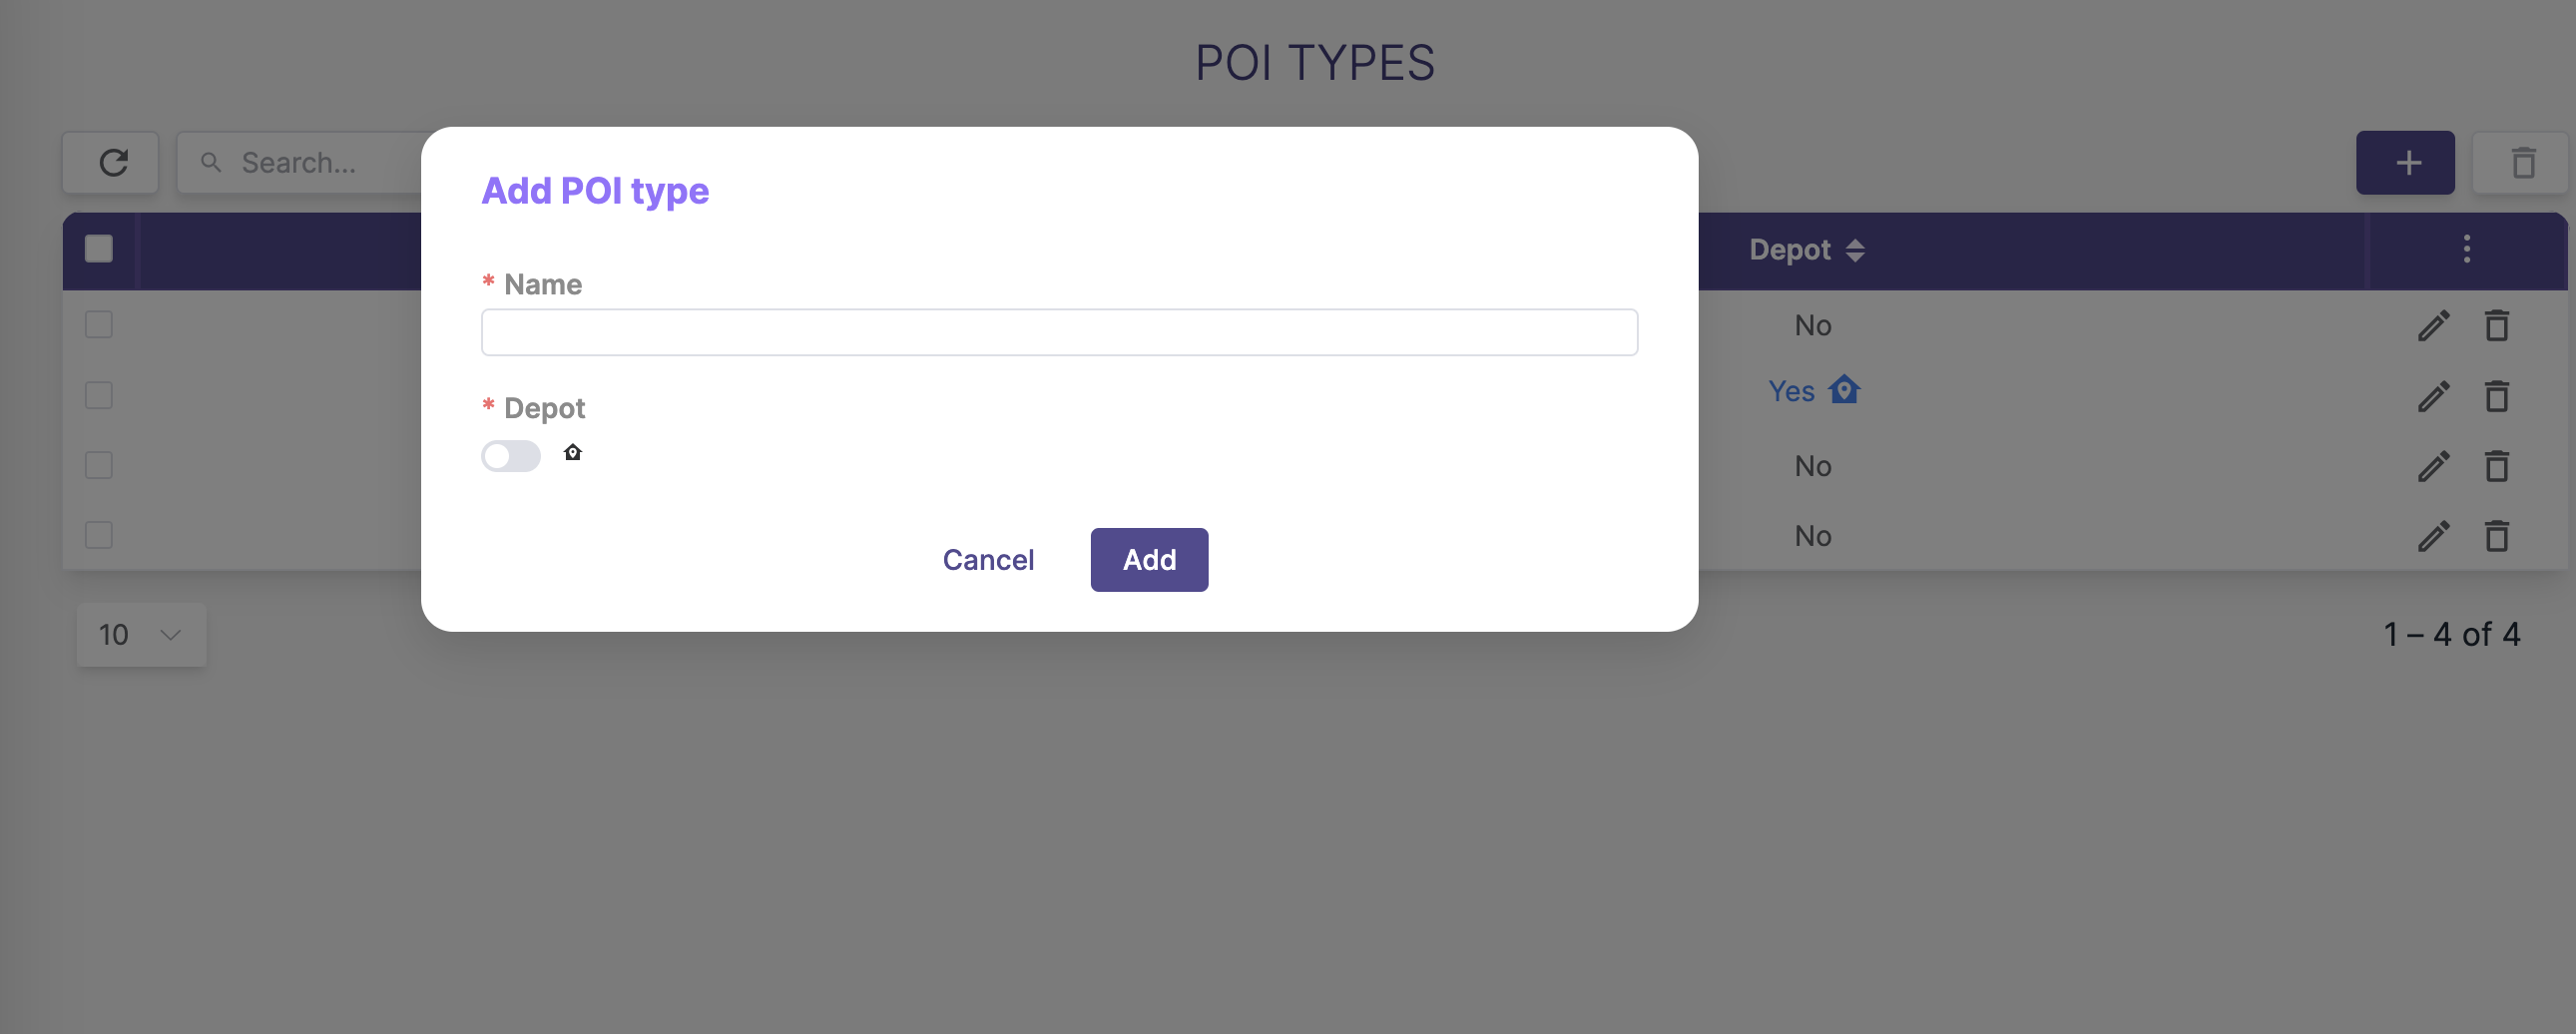
2. The Points of Interest database (POI)
The place database (POI) represents all locations related to the client's operations, in particular depots where vehicles are stationed.
2.1. POI summary
A summary of all POIs saved in the database allows you to view them on a map and in a table.
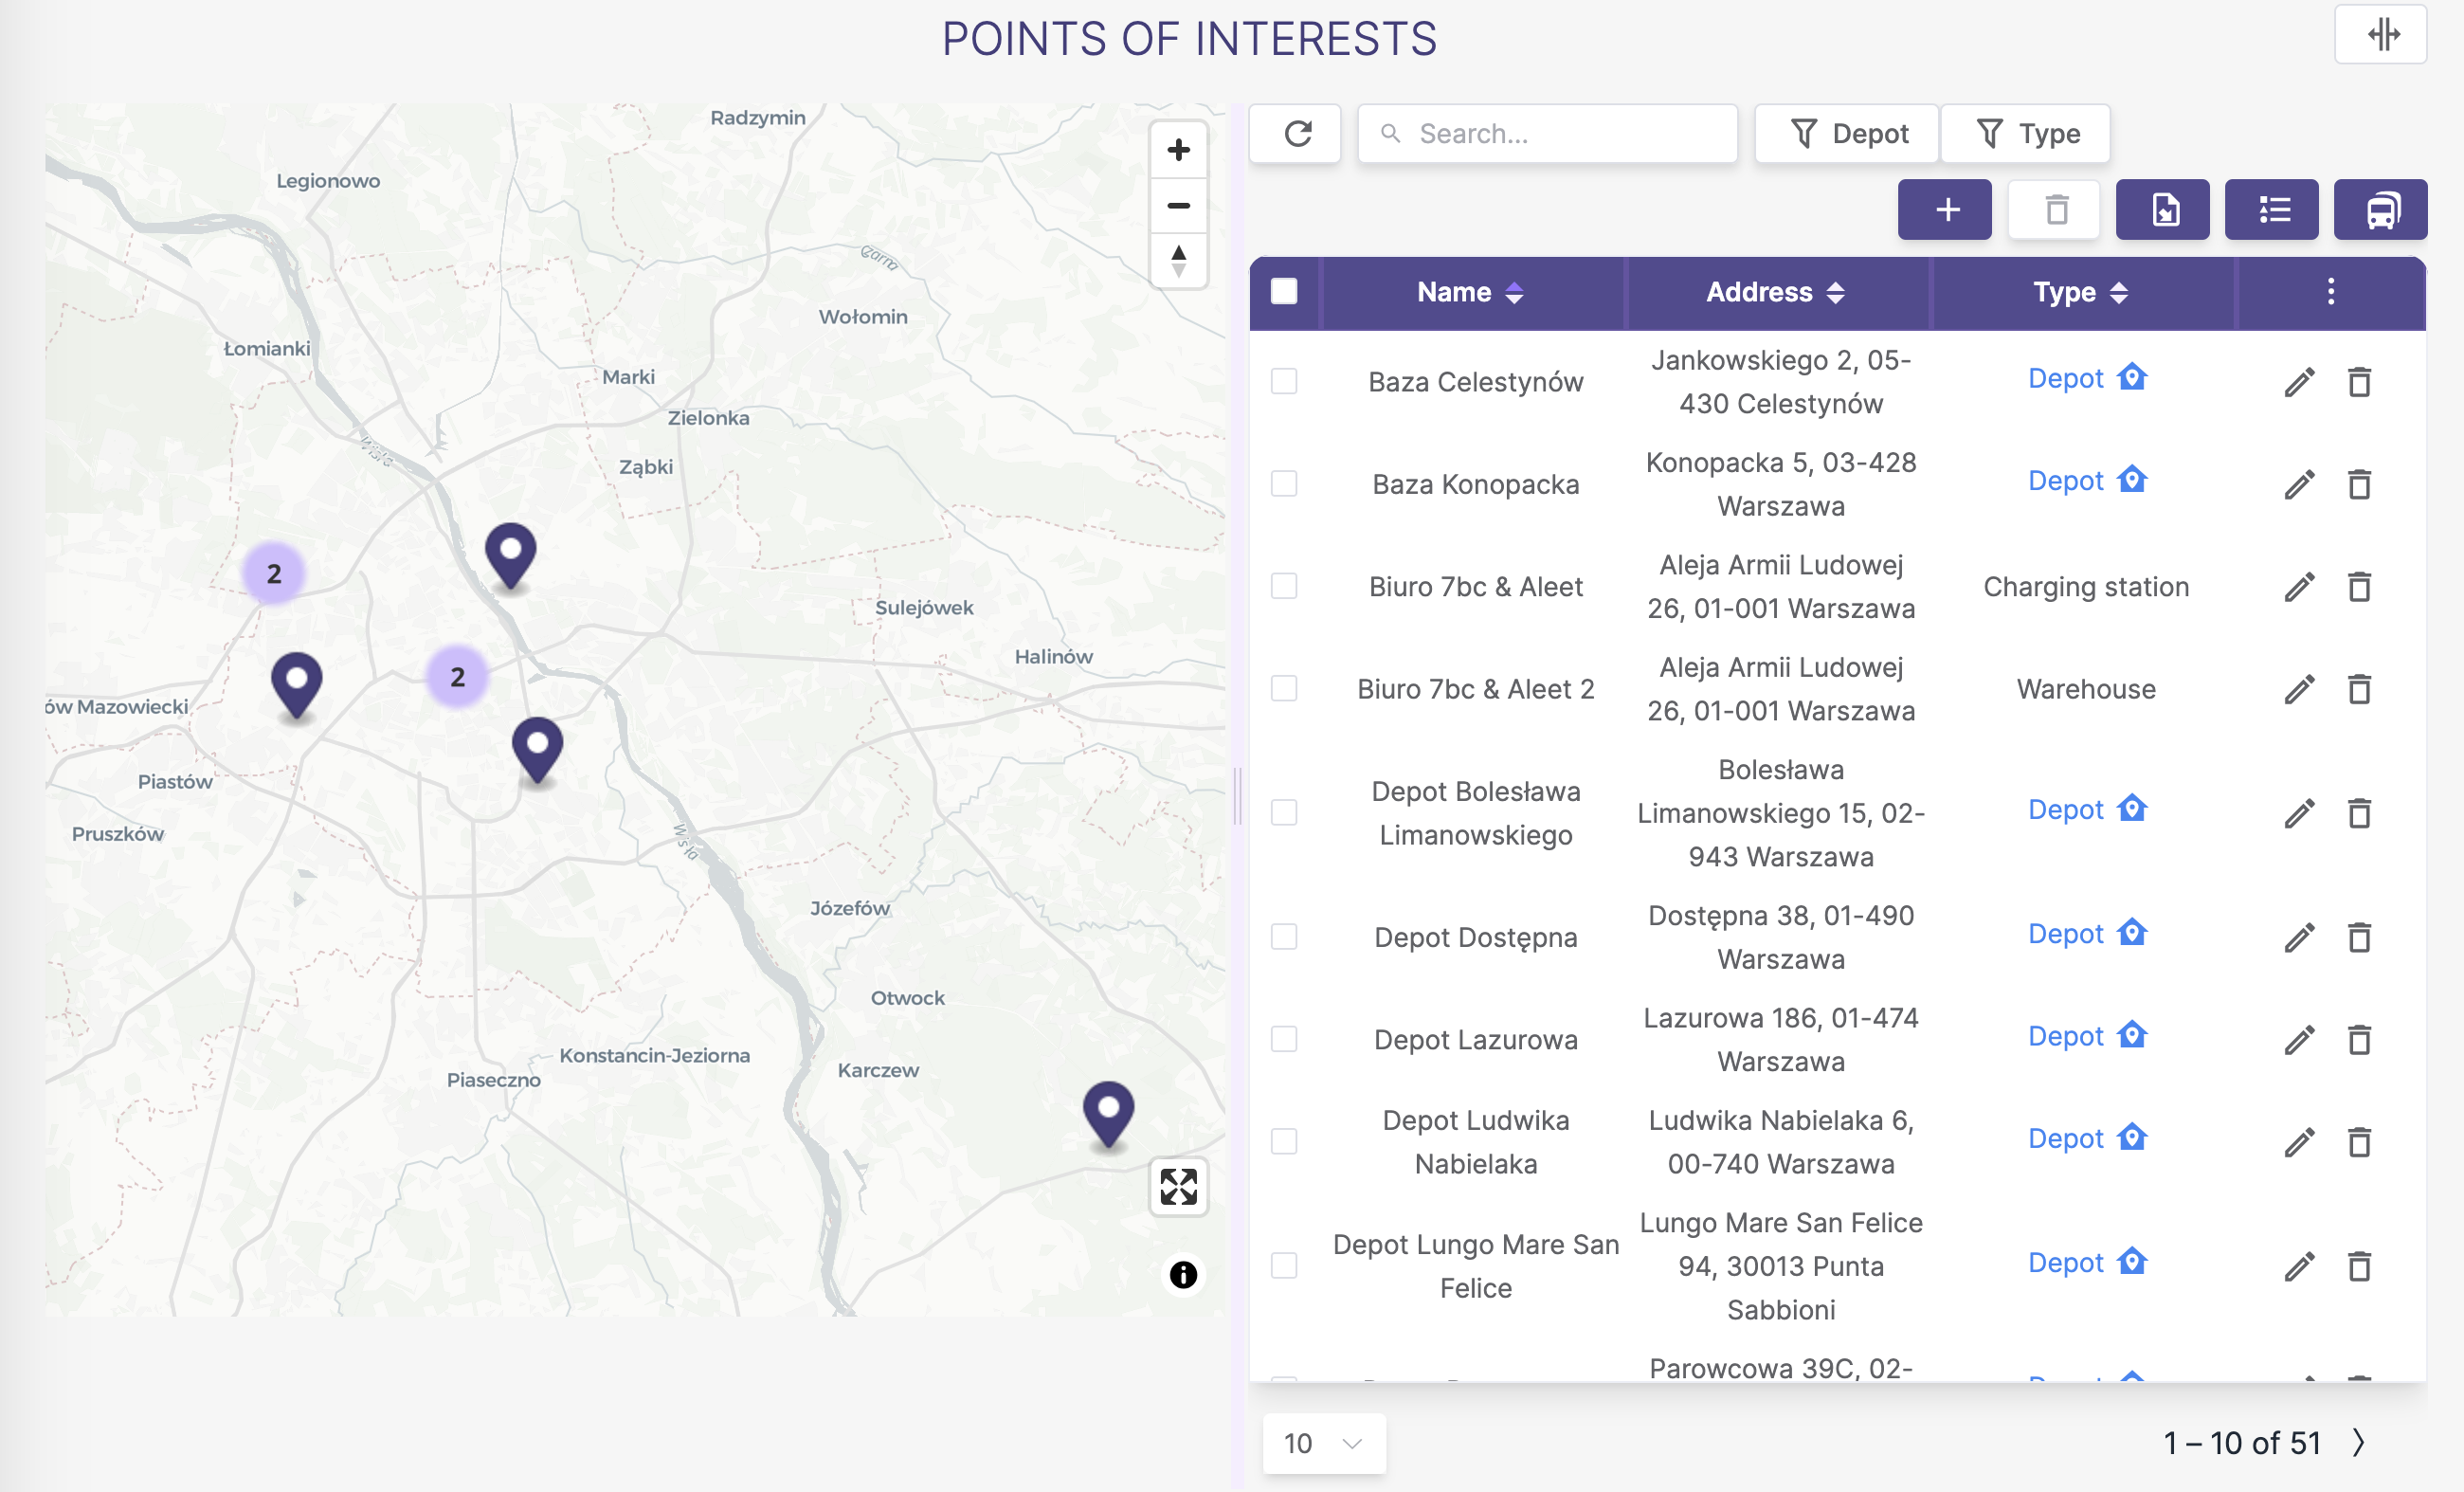
The tabular list of POIs contains information such as:
- name - the name of the POI declared by the client
- address - exact address of the point (street, postal code, city)
- type- type of POI, among those declared by the client. If the
is_depotflag has been assigned to a type, a house symbol will appear next to its name,
Filtering and Search
- search: text search filter looks for matching text in name and address.
- type - search by poi types declared by the client
- database - filtering points
only database,only not database
2.2. Adding POIs via the form
❗ Before creating your first POI, create POI types . See chapter: Poi types❗
The buttons for adding individual points via the form are located in the upper right corner, above the table with POIs
Adding a new point via the form: 
The form for creating a new POI contains the following fields:
- name - any unique name for the point
- type- POI type selector. ❗ If the selector is empty or does not have the type you are looking for, create POI types link. ❗
Form for creating a new point: 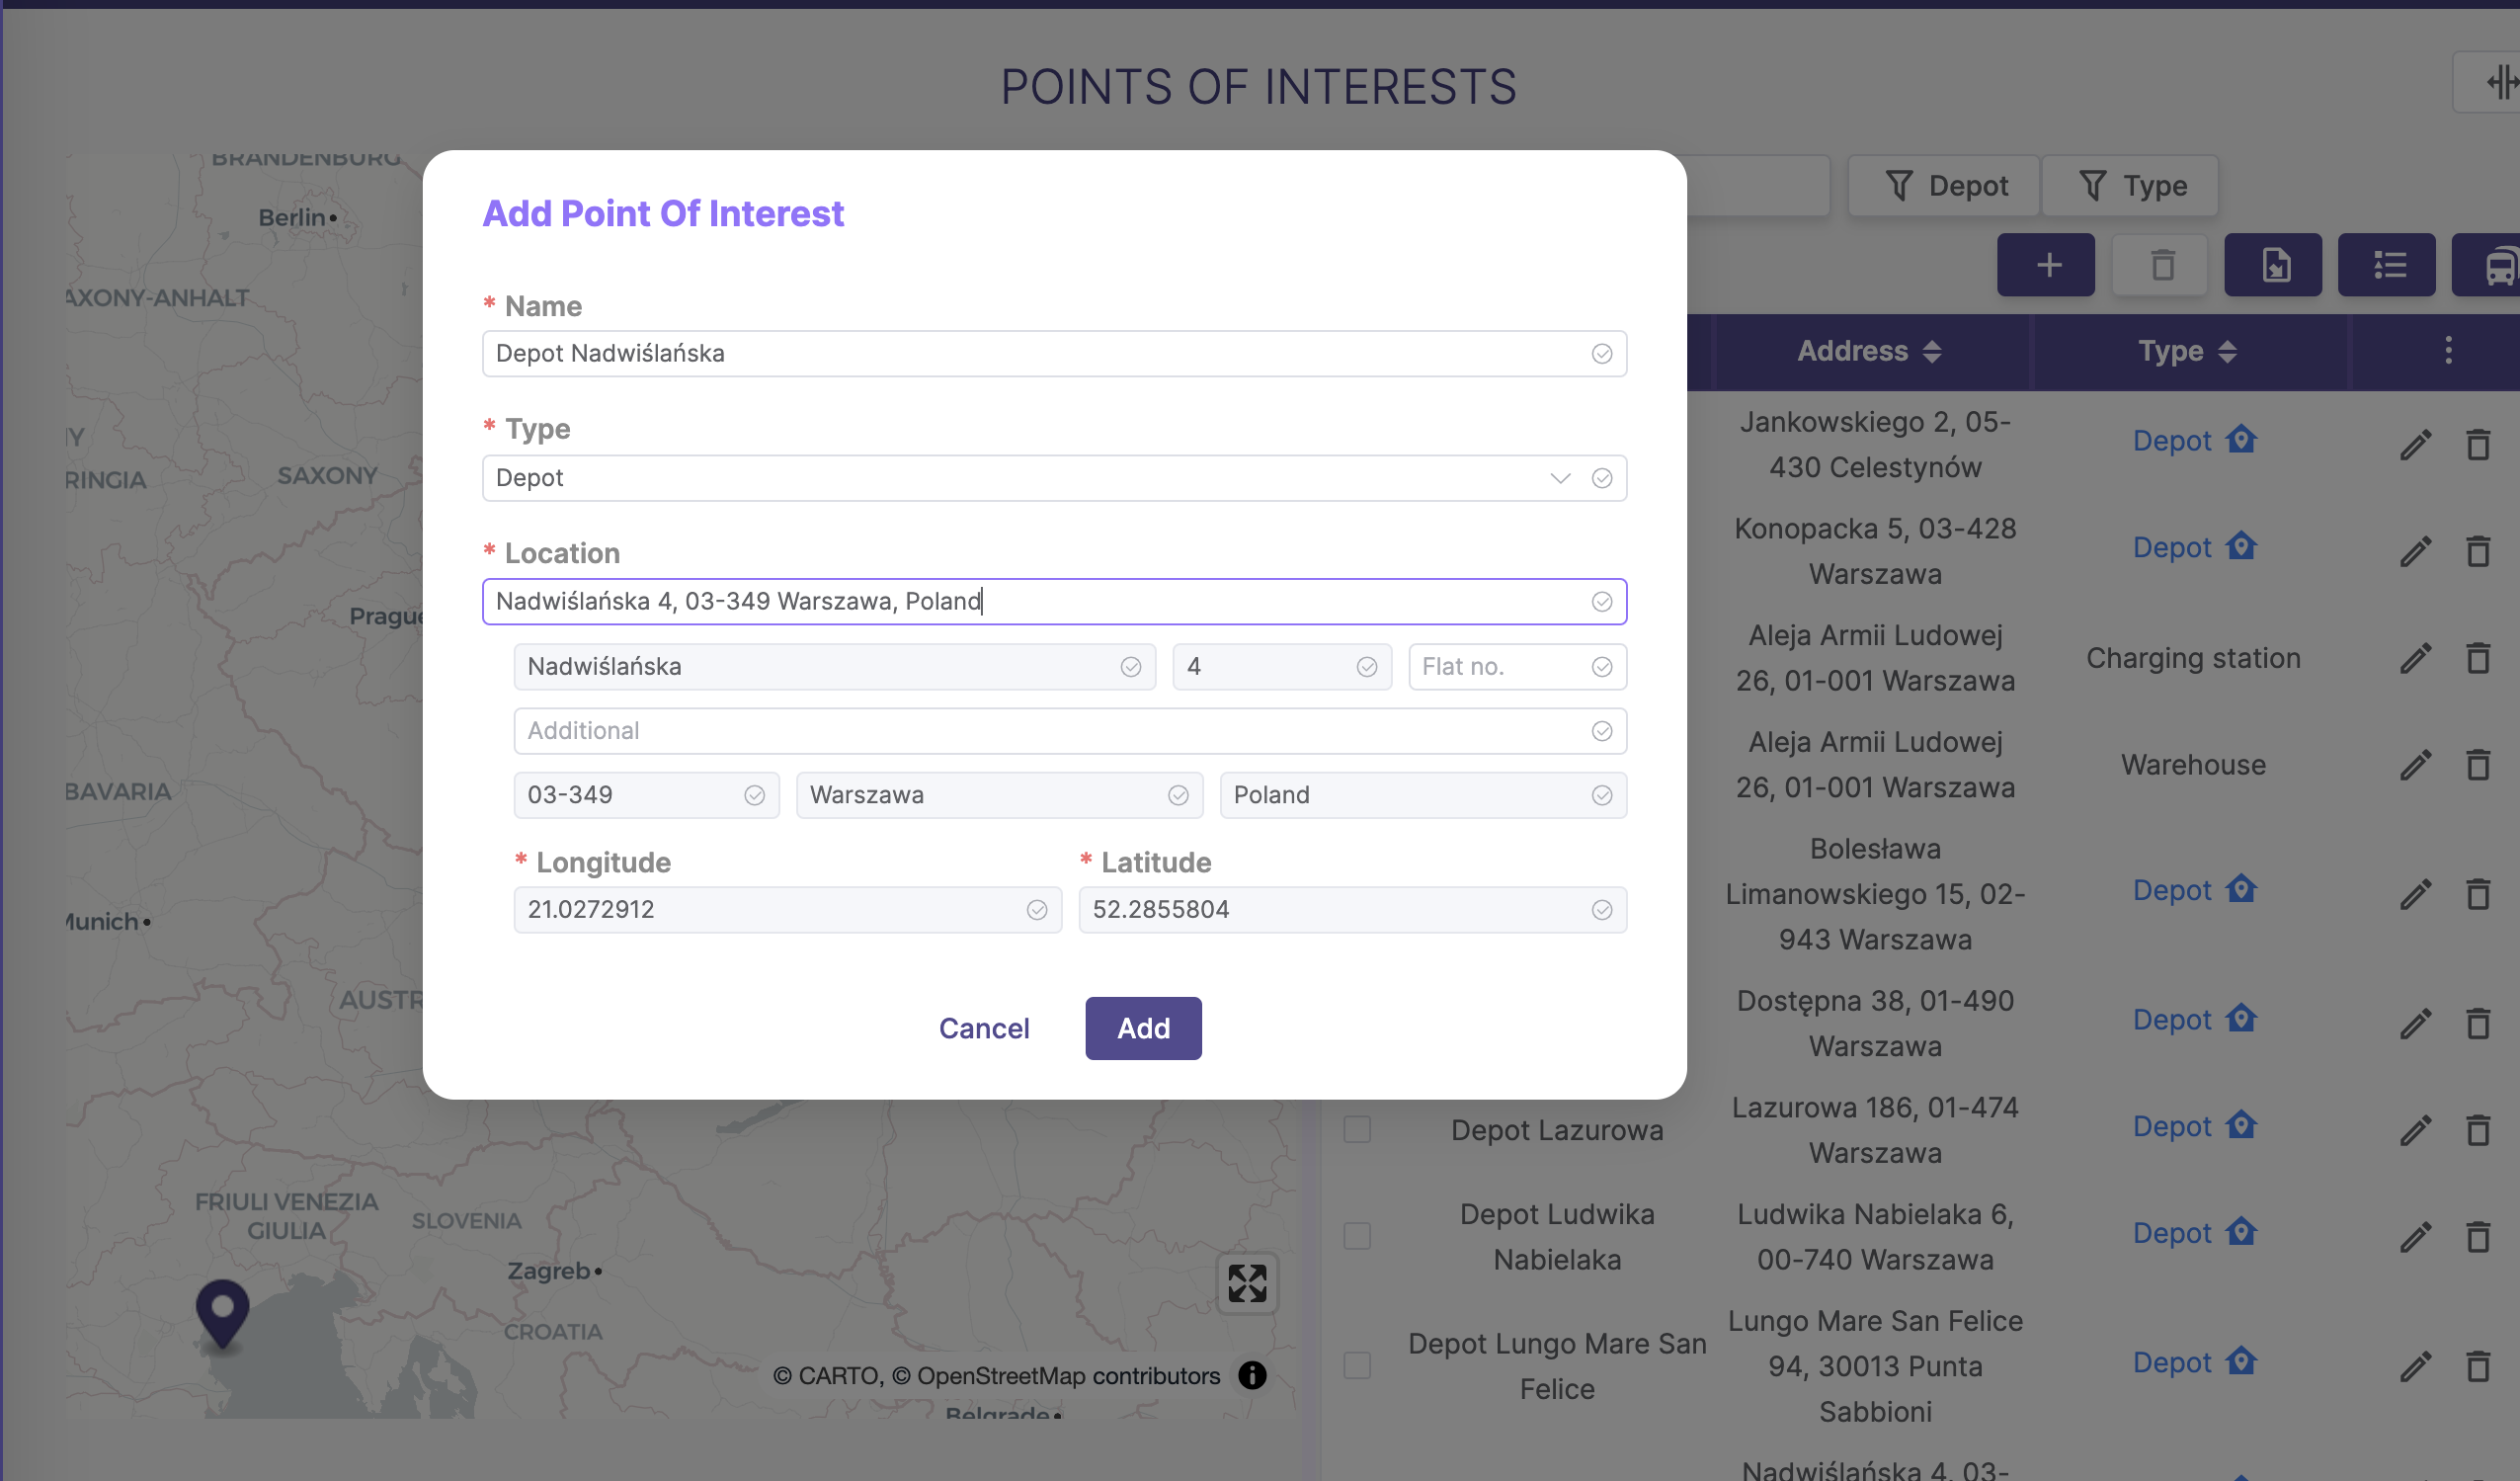
2.3. Adding POIs from a CSV file
Importing POI points from a file is a mechanism that allows you to quickly save a large amount of data from a file.
A. POI import template
❗ Download the POI's Import Template in CSV format: poi.csv❗
Follow these steps to import POIs:
- Download the CSV import template.
- Open the CSV file in a program like Microsoft Excel or Google Sheets.
- Enter your details:
- Add new items in the columns listed in Table 1.
- Make sure the headers match Table 1; otherwise, the import will fail.
- Fill in the required fields with data of the type specified in table 1 (string,int); importing won't be possible without them.
- After adding your data, save the file in CSV format, following the guidelines in sections B and C.
B. CSV file - general requirements
- Import only works with CSV files.
- Use semicolon ( ; ) as the separator and UTF-8 encoding.
- Headers must match Table 1 and the template; otherwise, import will fail.
- Each POI should occupy one line.
C. CSV file - detailed requirements
Refer to Table 1 for obligatory header names, data types, required fields, and descriptions.
Table 1. Scope of data to import
| Header | Data type | Required? | Description |
|---|---|---|---|
| name | String | Tak | Unique POI point name |
| typeName | String | Tak | The name of the POI type that appears in the database - selected from the client's declared POI types ❗ Before creating POI point, create POI types .See the poi types section link❗ |
| position_lat | Float | Tak | The latitude of the point |
| position_lon | Float | Tak | Longitude of the point |
| address_country | String | Tak | POI address: country |
| address_postalCode | String | Tak | POI address: postal code |
| address_street | String | Tak | POI address: street |
| address_streetNumber | String | Tak | POI address: street number |
| address_flatNumber | String | Nie | POI address: flat number |
| address_additional | String | Nie | POI address: address additiona information |
D. POI import process
To proceed to the import of POIs from a file, click the button located above the table on the right
Go to the POI import page
To import a file, follow these steps:
- Select the
.csvfile and confirm your selection with theUploadbutton.
Adding POI - confirmation of file upload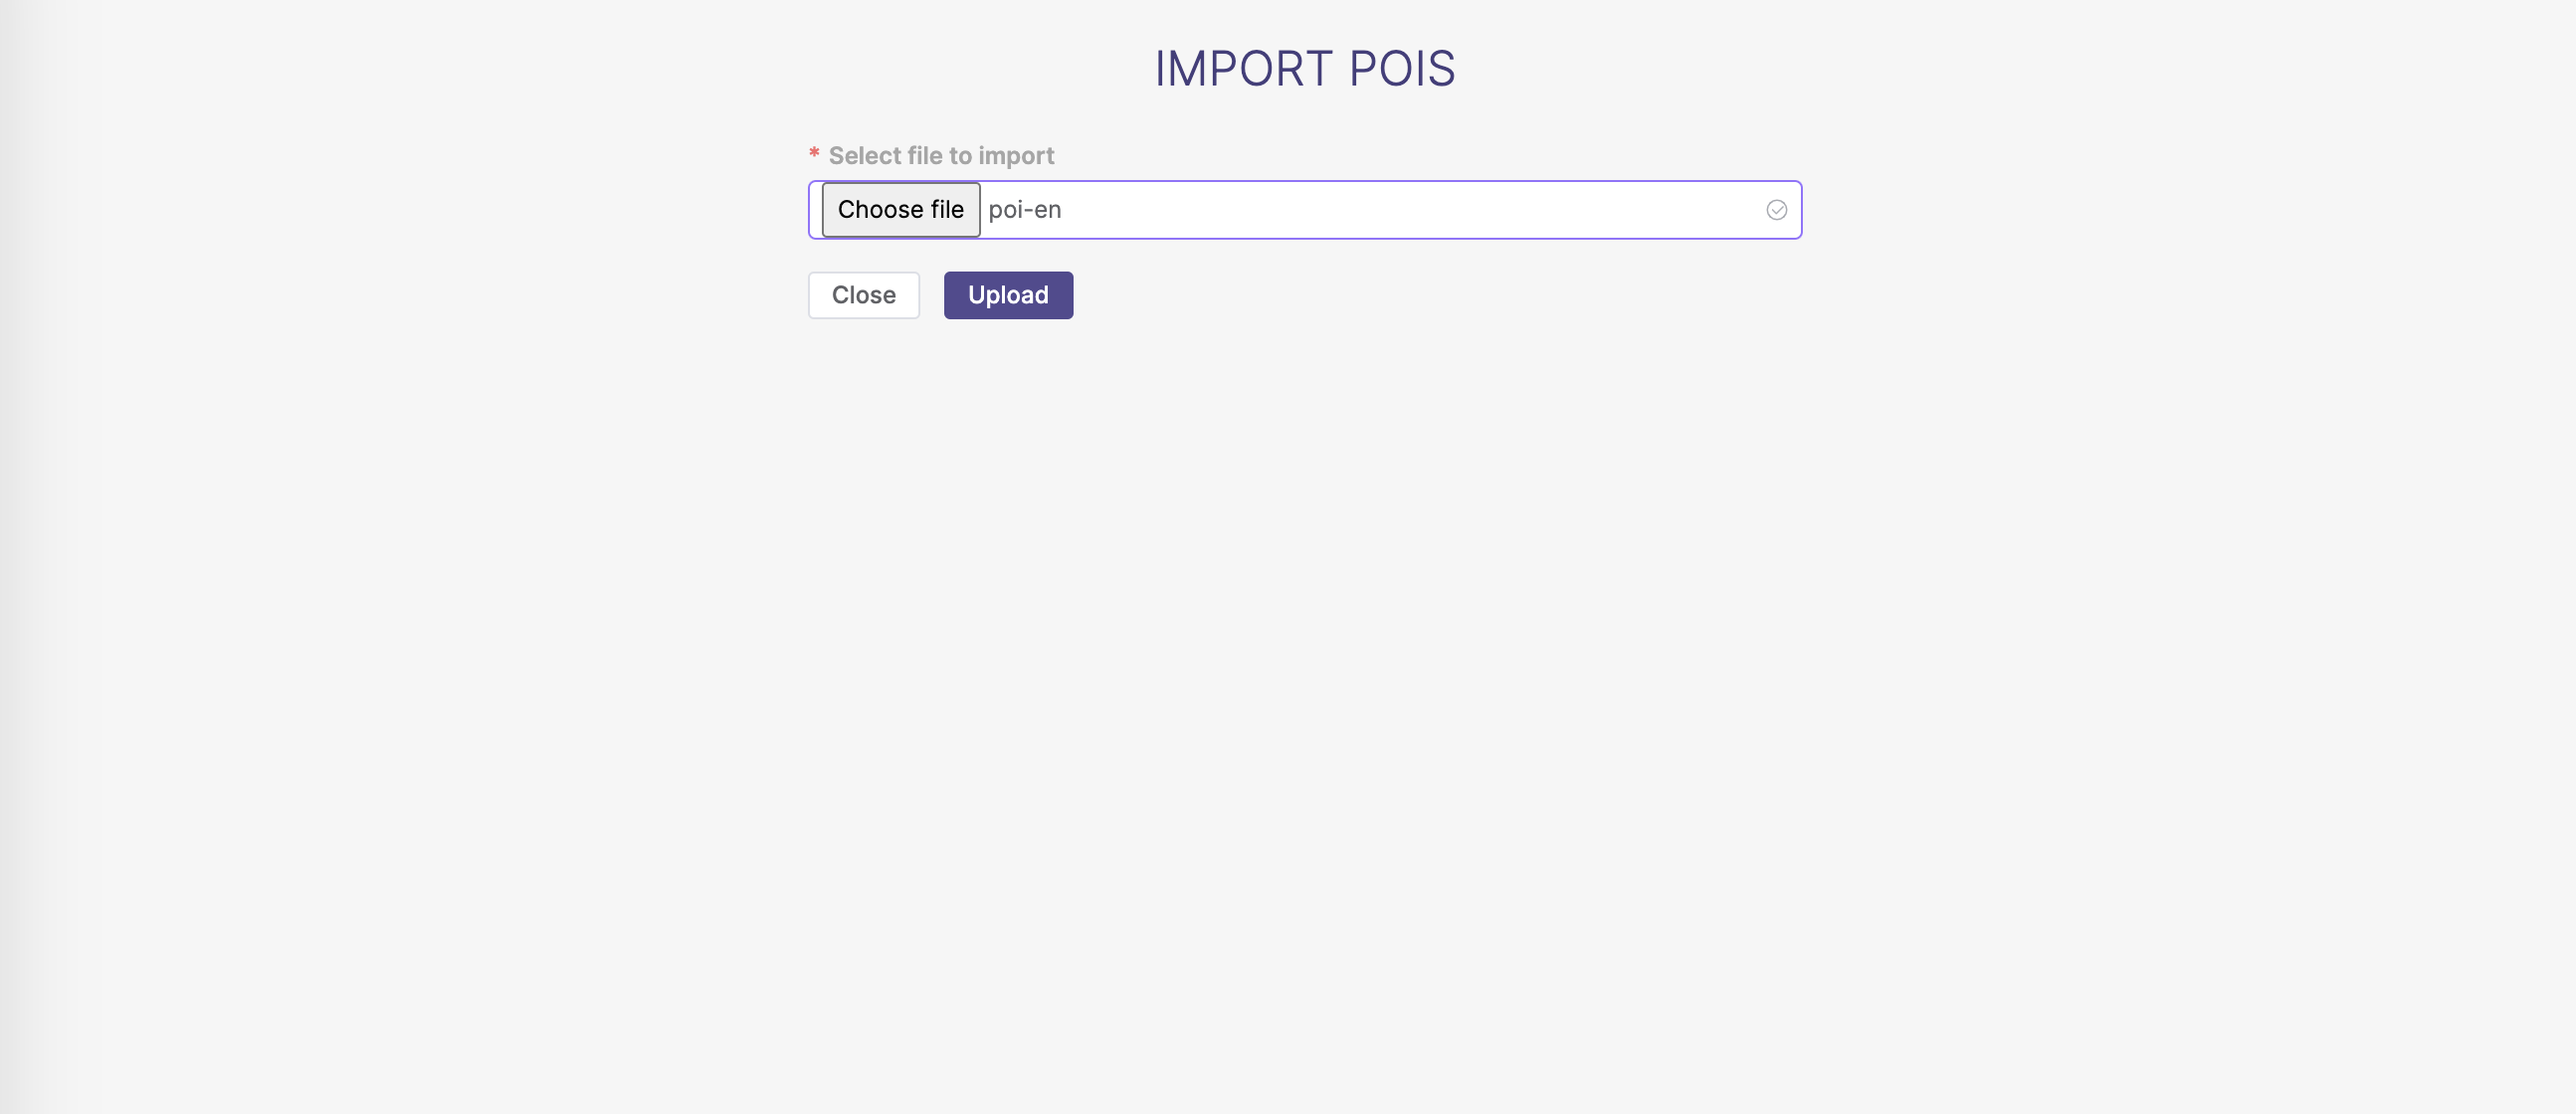
- A preview of the POI you intend to upload will be displayed on the screen
If the imported data is correct, confirm the import with the
CreatebuttonIf, after importing the file, you would like to correct some data, click the
Backbutton, modify the relevant data in the file (e.g. in Microsoft Excel®), and then import the file again.Adding POI - preview of imported POI
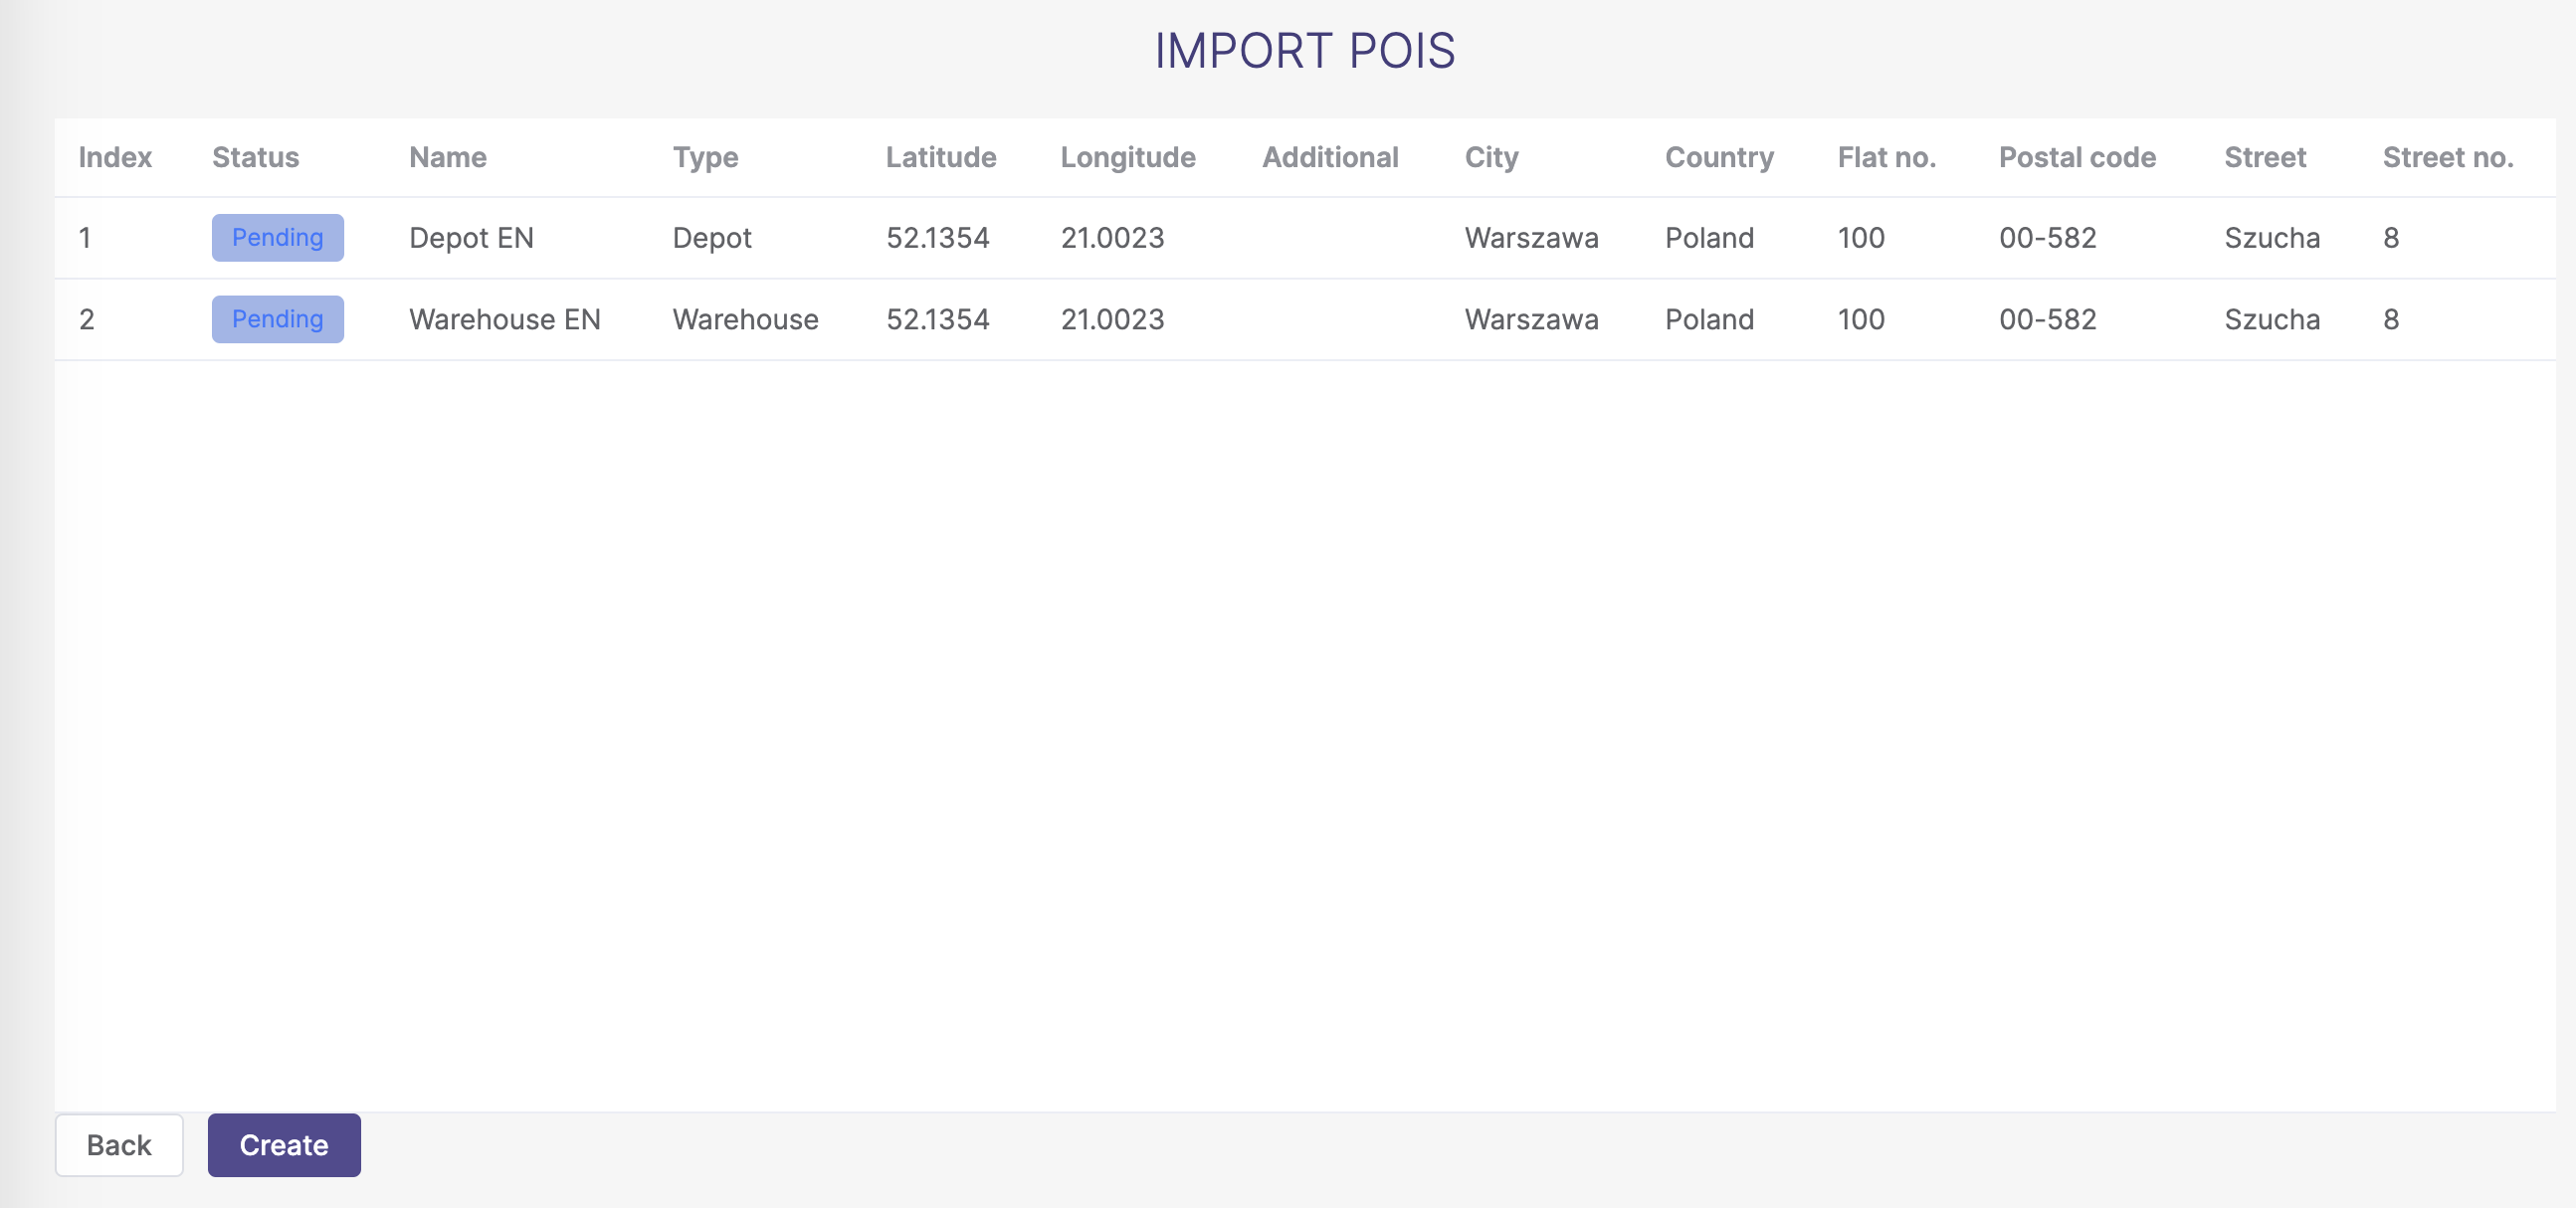
- Information about the number of correctly imported POI will be displayed on the screen
_ Adding POI - correctly imported POI_ . 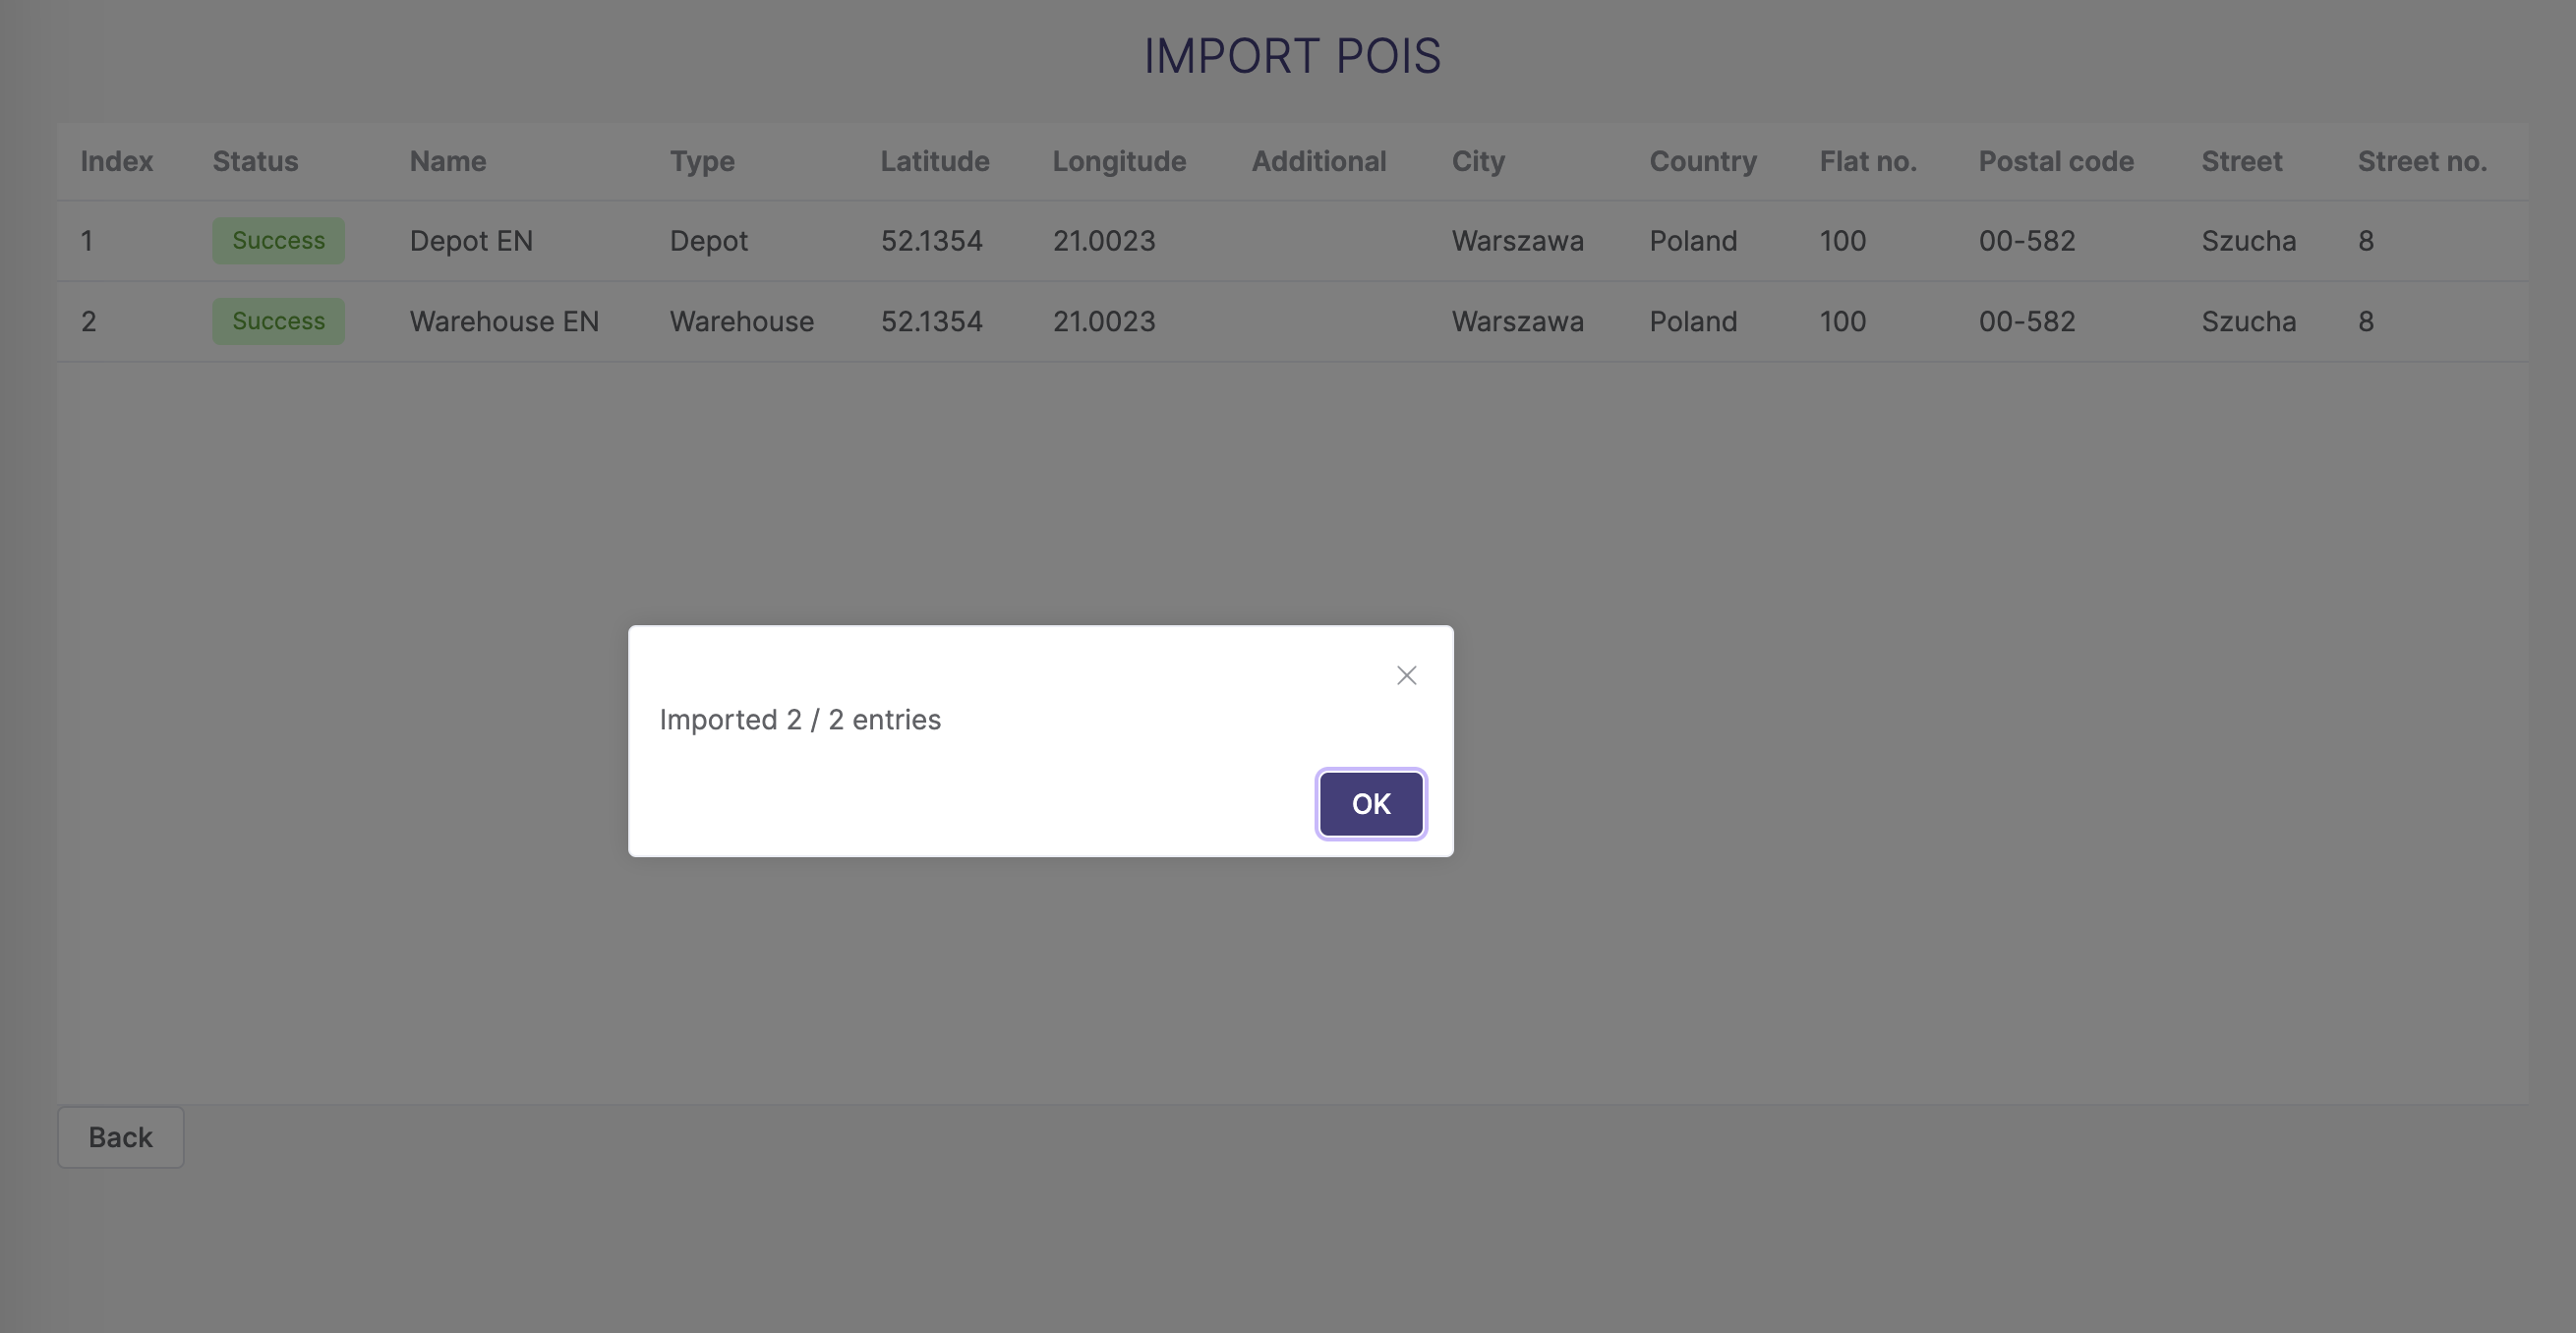
3. Vehicles assigned to POI
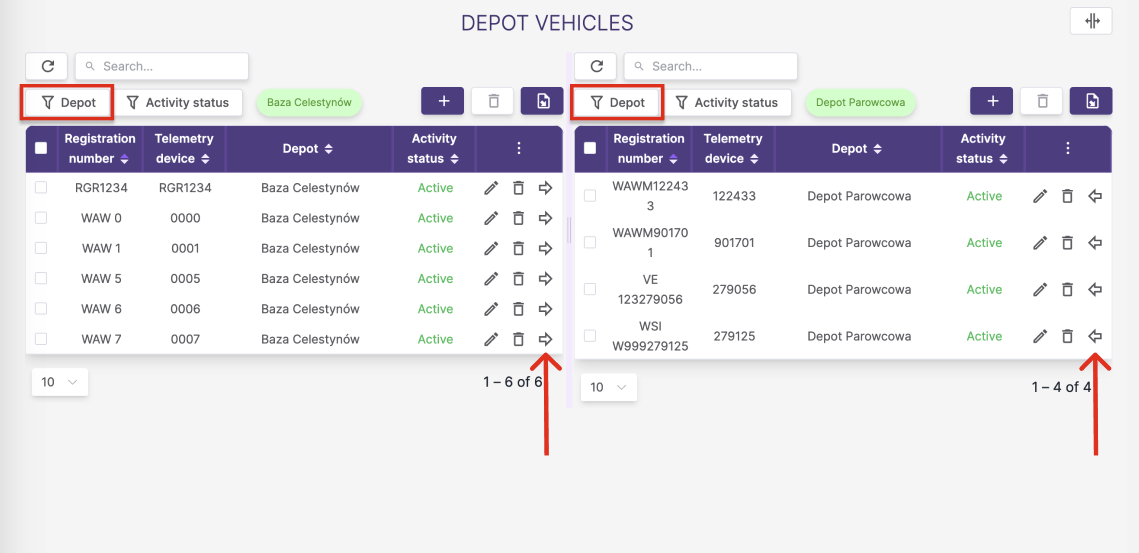
Users can view all vehicles assigned to the database and transfer vehicles between selected depots/bases.
How to redirect to manage vehicles page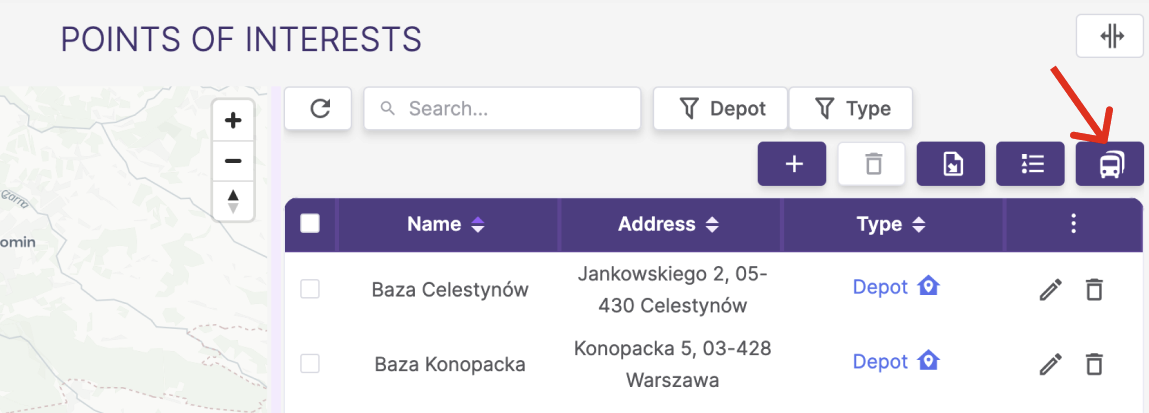
To change the vehicle assigned to a given depot, select the appropriate depot and the destination depot. Find the vehicle you want to move and press the arrow button.
Managing vehicles in POI