The Vehicles
The Vehicles page, available from the main menu, contains information about all vehicles in the customer's fleet.
It allows you to add new vehicles (via the form and from the *.csv file), edit and delete existing ones.
Vehicles are physical objects closely related to the telematics devices installed in them.
1.The vehicle data - what do they contain?
Vehicles and all information about them can be defined by an authorized user. Vehicle data is classified below depending on their importance and role:
1.1 Mandatory
- Name - A unique user-defined name. Used throughout the application to identify the vehicle.
- Activity status - the flag indicates whether the vehicle is to be used in tasks. Possible options: Active/Inactive/Removed
- Active - transport tasks can be assigned to the vehicle. The vehicle will be taken into account when calculating statistics.
- Inactive - the vehicle will not be taken into account when generating allocations or calculating statistics
- Removed - the vehicle is no longer a part of a fleet but stays in historical records
- Depot - the depot to which the vehicle is assigned. Each vehicle is always assigned to exactly one depot at a time. Changing the depot to which a vehicle is assigned is possible in the POI page or in a single route view on Assignment page (redirection/rebalancing)
- Provider - Telematics device service provider, to choose from a list of providers configured for the customer.
- Device ID - Telematics device identifier - identifier defined in an external system providing live transmission of vehicle data.
- Capacity - vehicle load capacity in "abstract units"
- Plate number
1.2. Additional - Not required but affecting vehicle operations
- Driver – driver assigned to the vehicle. The routes to be completed are assigned to the vehicle. Only the driver assigned to a given vehicle, after logging in to the driver application, will be able to see and perform tasks on the routes to which the vehicle is assigned.
- Working time - time window during which the vehicle can perform tasks. The vehicle cannot participate in tasks that extend beyond this window.
1.3. Informational - can be defined for the user's convenience and does not affect the use of the vehicle
The informational type data is displayed in the monitoring in a single vehicle preview.
- Zone - user-defined vehicle operation zone
- Vehicle type - one of:
Car,Van,Minivan,Semi-trailer truck. - Fuel type - one of:
Petrol,Diesel,Electric,Hybrid. - VIN number
- Model - vehicle model
- Production year
- Tank capacity - fuel tank capacity in L.
- Gross axle weigh - in kg
- Gross vehicle weight - in kg
2. The vehicles list
Fig. 1 Vehicles list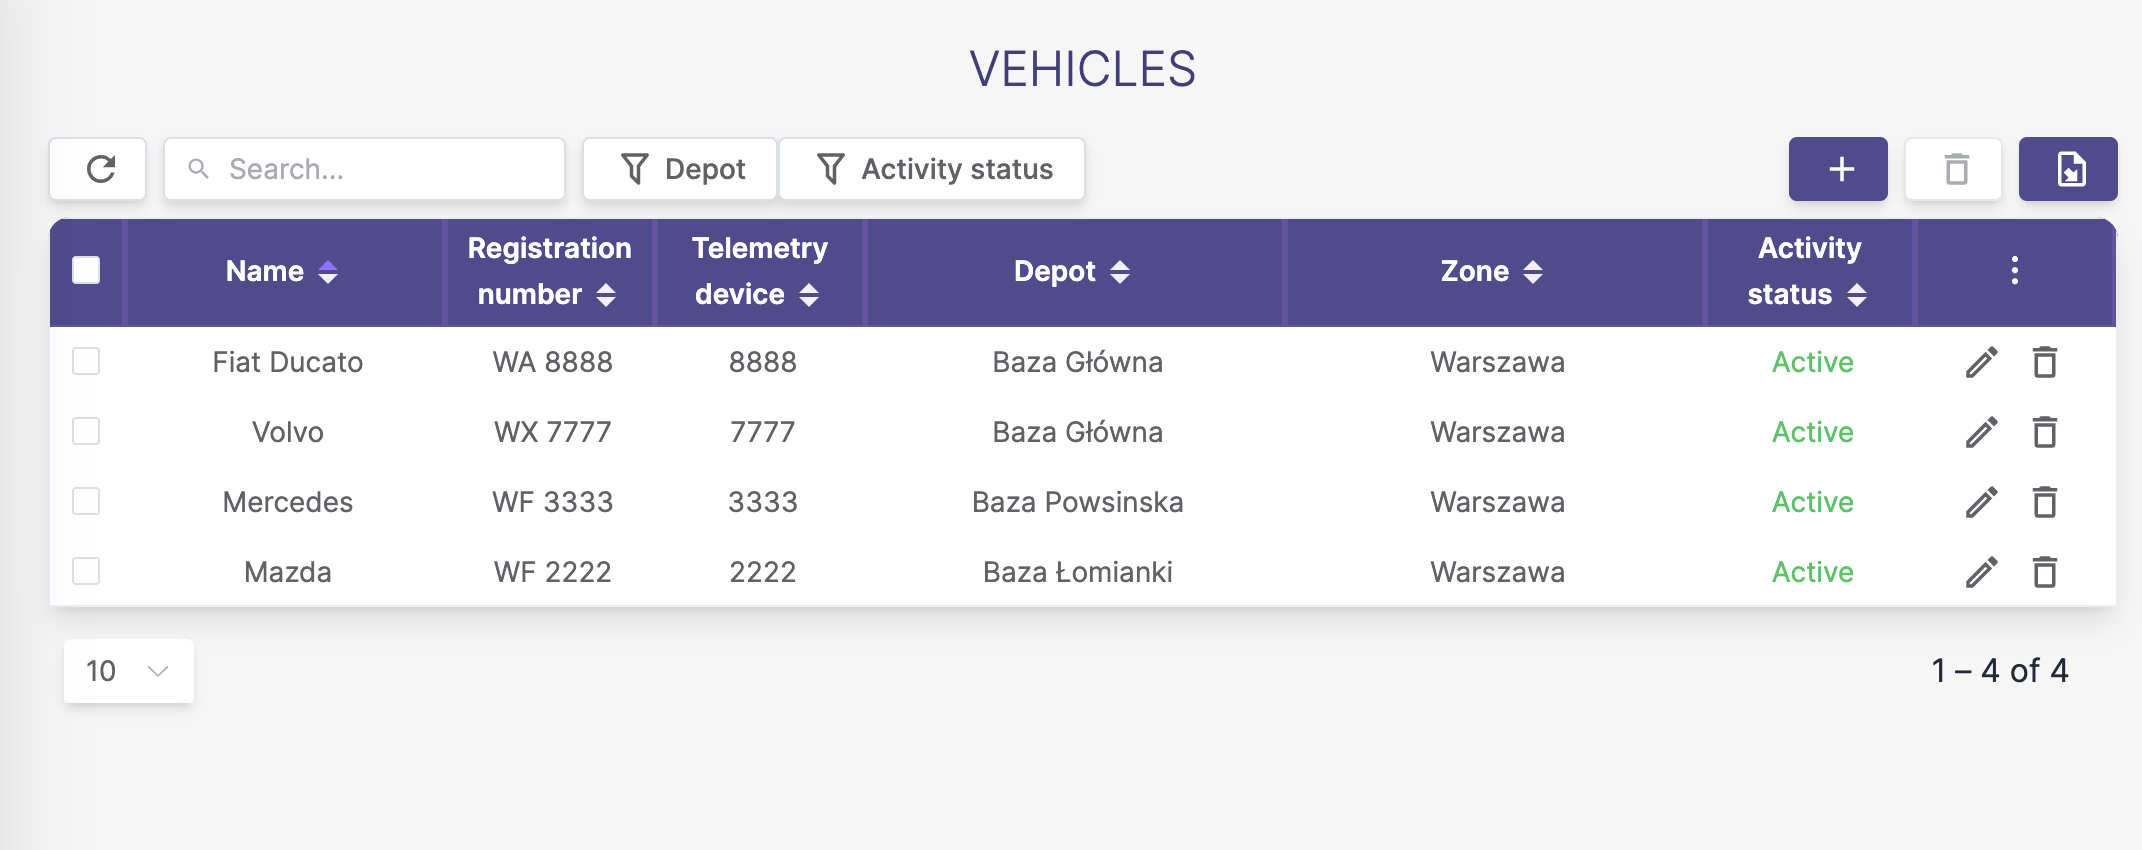
Available from the main menu. The user can view all vehicles in the fleet.
The tabular list of vehicles contains the following columns:
- Name
- Registration number
- Telemetry device
- Depot
- Zone
- Activity status
Filtering and Search
Search :
- Text search filter looks for matching text in vehicle
name,registration number,telematics device id.
Filters :
- Depot - selected from the tenant's depot list
- Active status - Active/Inactive/Removed
3. Adding a new vehicle
The user can add a new vehicle in 2 ways:
3.1. Form
Fig. 2 Create new vehicle form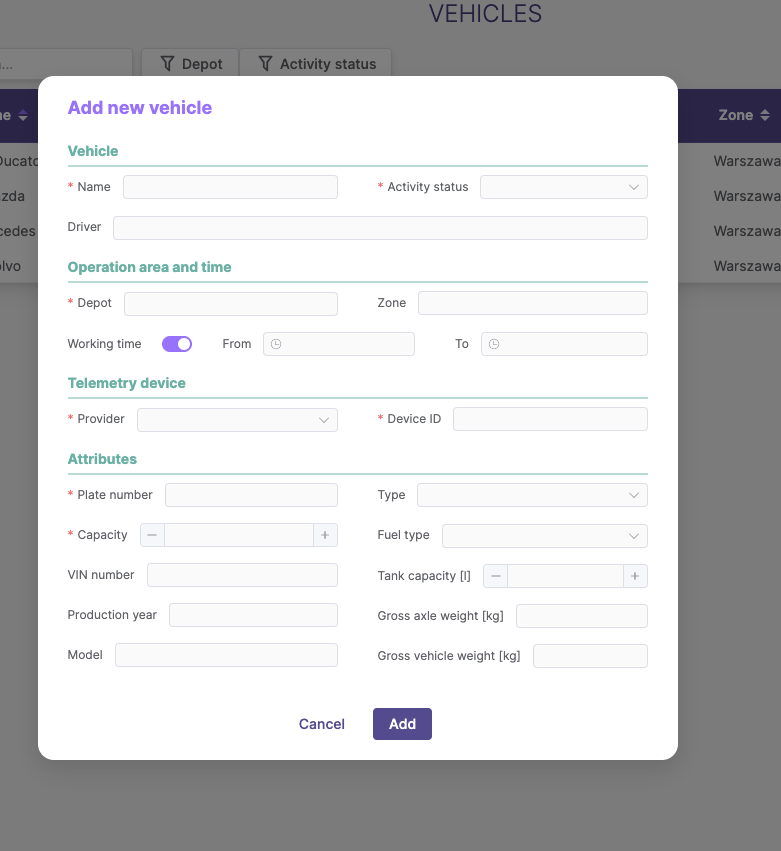
3.2. Import of vehicles from a CSV file
Importing vehicles from a file is a mechanism that allows you to quickly save a large amount of data from the file.
A. The Vehicle Import Template
❗ Download the Vehicle Import Template in CSV format: vehicles.csv❗
Follow these steps to import vehicles:
- Download the CSV import template.
- Open the CSV file in a program like Microsoft Excel or Google Sheets.
- Enter your details:
- Add new items in the columns listed in Table 1.
- Make sure the headers match Table 1; otherwise, the import will fail.
- Fill in the required fields with data of the type specified in Table 1 (string,int); importing won't be possible without them.
- You can use any language for most fields.
- After adding your data, save the file in CSV format, following the guidelines in sections B and C.
B. CSV file - general requirements
- Import only works with CSV files.
- Use semicolon ( ; ) as the separator and UTF-8 encoding.
- Headers must match Table 1 and the template; otherwise, import will fail.
- Each vehicle should occupy one line.
C. CSV file - detailed requirements
Refer to Table 1 for obligatory header names, data types, required fields, and descriptions.
Table 1. Scope of data to import
| Header | Data type | Required? | Description |
|---|---|---|---|
| name | String | Yes | Unique user-defined vehicle name |
| type | String | No | Vehicle type: Allowed values: CAR, MINI_VAN, VAN, SEMI_TRAILER_TRUCK |
| model | String | No | Vehicle model |
| year | Int | No | Year of vehicle production |
| vin | String | No | Vehicle Vin number |
| plate | String | Yes | Registration number |
| fuelType | String | No | Fuel Type. Permissible values: DIESEL, ELECTRIC,HYBRID, HYBRID PETROL |
| fuelTankCapacity | Int | No | Tank capacity in liters |
| grossVehicleWeight | Int | No | Permissible total vehicle weight in kg |
| grossAxleWeight | Int | No | Permissible axle load in kg |
| loadCapacityU | Int | Yes | Vehicle load capacity |
| workingTimeStart | AWSTime | No | Vehicle start time |
| workingTimeEnd | AWSTime | No | Vehicle end time |
| zone | String | No | Zone |
| depotId | String | Yes | Database id - internal unique, database identifier |
| driverId | String | No | Driver ID |
| telematicsDeviceId | String | Yes | Telematics device ID |
| telematicsProvider | String | Yes | Telematics device provider |
| active | String | Yes | Vehicle status. Possible values: ACTIVE, NOT_ACTIVE, REMOVED |
D. The Vehicle import process
To import vehicles from the file, click the button located above the table on the right
Fig. 3 Go to the vehicle import page
To import a file, follow the steps below:
- Select the .csv file and confirm your selection with the
Loadbutton.
Fig.4 Adding Vehicles - confirming file upload
- The screen will display a preview of the vehicles you are about to import
If the imported data is correct, confirm the import with the `Create' button
If after importing the file you would like to correct some data, click
Backbutton, modify the appropriate data in the file (e.g. in the program Microsoft Excel®), and then import the file again.
Fig. 5 Adding vehicles - preview of imported vehicles

- Information about the number of correctly imported vehicles will be displayed on the screen
Fig. 6 Adding vehicles - correctly imported vehicles. 